RAW vs JPEG for Street Photography — and How to Edit for Mood
Shoot RAW for street photography. Street light is high-contrast and unpredictable, and RAW gives you the latitude to recover blown highlights and crushed shadows that a JPEG throws away. Shoot RAW+JPEG if you want quick previews to share, or JPEG-only if speed and a small workflow matter more to you than editing flexibility. Then edit for mood, not technical perfection.
Here's the fuller answer.
RAW vs JPEG, plainly
A JPEG is baked: the camera makes the decisions about contrast, colour, and sharpening, and discards the rest. A RAW file keeps everything the sensor recorded, so you make those decisions later — and you can rescue a highlight or lift a shadow that a JPEG would have lost forever. For high-contrast street scenes, that latitude is worth the larger file sizes.
The honest counterpoint: plenty of great street photographers shoot JPEG on purpose. It forces you to get exposure right in-camera, keeps your workflow fast, and modern camera JPEGs are excellent. If editing feels like a chore that keeps you off the street, JPEG is a legitimate choice. Start with RAW, and switch later if you want to.
My preference is to shoot RAW. I find that my editing workflow has evolved to a point that shooting in JPEG would not make it any faster. I spend most of my time culling, which isn't much, given the volume of images I often shoot in a single day. The reason is simple: I knew what I wanted before I shot. I know if I got it or not. The other part of culling is more about learning, mistakes made and happy accidents that can be converted into a technique the next day out.
The use of vintage glass gives me a look that is consistent across several focal lengths, eliminating the need for complicated colour correction from my editing equation entirely.
Editing for mood, not perfection
This is where I'll get opinionated. Most editing advice chases a clean, neutral, technically "correct" image. I chase the opposite — the feeling of the moment. That usually means:
- Contrast and restraint over clarity. I'm not trying to resolve every detail; I'm trying to make you feel the light.
- A disciplined palette. Muted, consistent colour, or committed black-and-white — not everything turned up.
- Grain and softness as friends. They sit closer to memory than clinical sharpness does. It's the same reason I shoot vintage glass that renders in SD, not 4K.
I use a neutral colour profile because I rely on my lenses to render the image's mood just as it occurred. There is no need to add punch or saturation in most cases. Even when I shoot commercially or at a wedding, I find that less is almost always more in the edit. If the frame tells a compelling story, that's enough; in fact, that is all there should be.
Find your own mood. Copy my style, try out another street photographer’s style. I think your style will fall somewhere between. Everything on this site is meant to be a suggestion, not a rule. Only you can decide what truly matters in your art.
The untold half: editing is mostly deleting
Here's the part nobody puts in a tutorial. A working morning leaves me with around a thousand frames. A dozen are worth keeping; half of those I'd ever publish. The rest go into the binary ether of a storage drive. Editing isn't mainly about sliders — it's about the brutal honesty to cut everything that isn't working. Learning to kill your darlings is half the craft, and it's directly tied to getting better.
Here is the quick version of my workflow. Upon importing to Adobe Lightroom, I apply a camera-neutral colour profile, lens-specific corrections, and keywords. All of the images are saved to my local drive and to a backup drive. The first edit is to cull. I flag everything I wanted in the moment I shot it. In the case of multiple takes on the same scene, I take the best ones from each take. I select the flagged photos, invert the selection, and delete all unselected images from my catalogue/drive. Now the days shoot has gone from 1500 images to 50. Of the remainder, I give them a star on a second pass through. Stared images are edited and can be shared. Of the 50 or so images that make it to the second cull, 5 to 10 get a star.
Culling is difficult; it is supposed to be. It is the last moments you spend with the creation of an image. Embrace that pain.
We work through real edits — RAW developing and, more importantly, ruthless selection — in a one-on-one Tokyo Forgeries masterclass. New here? Start with what street photography is.
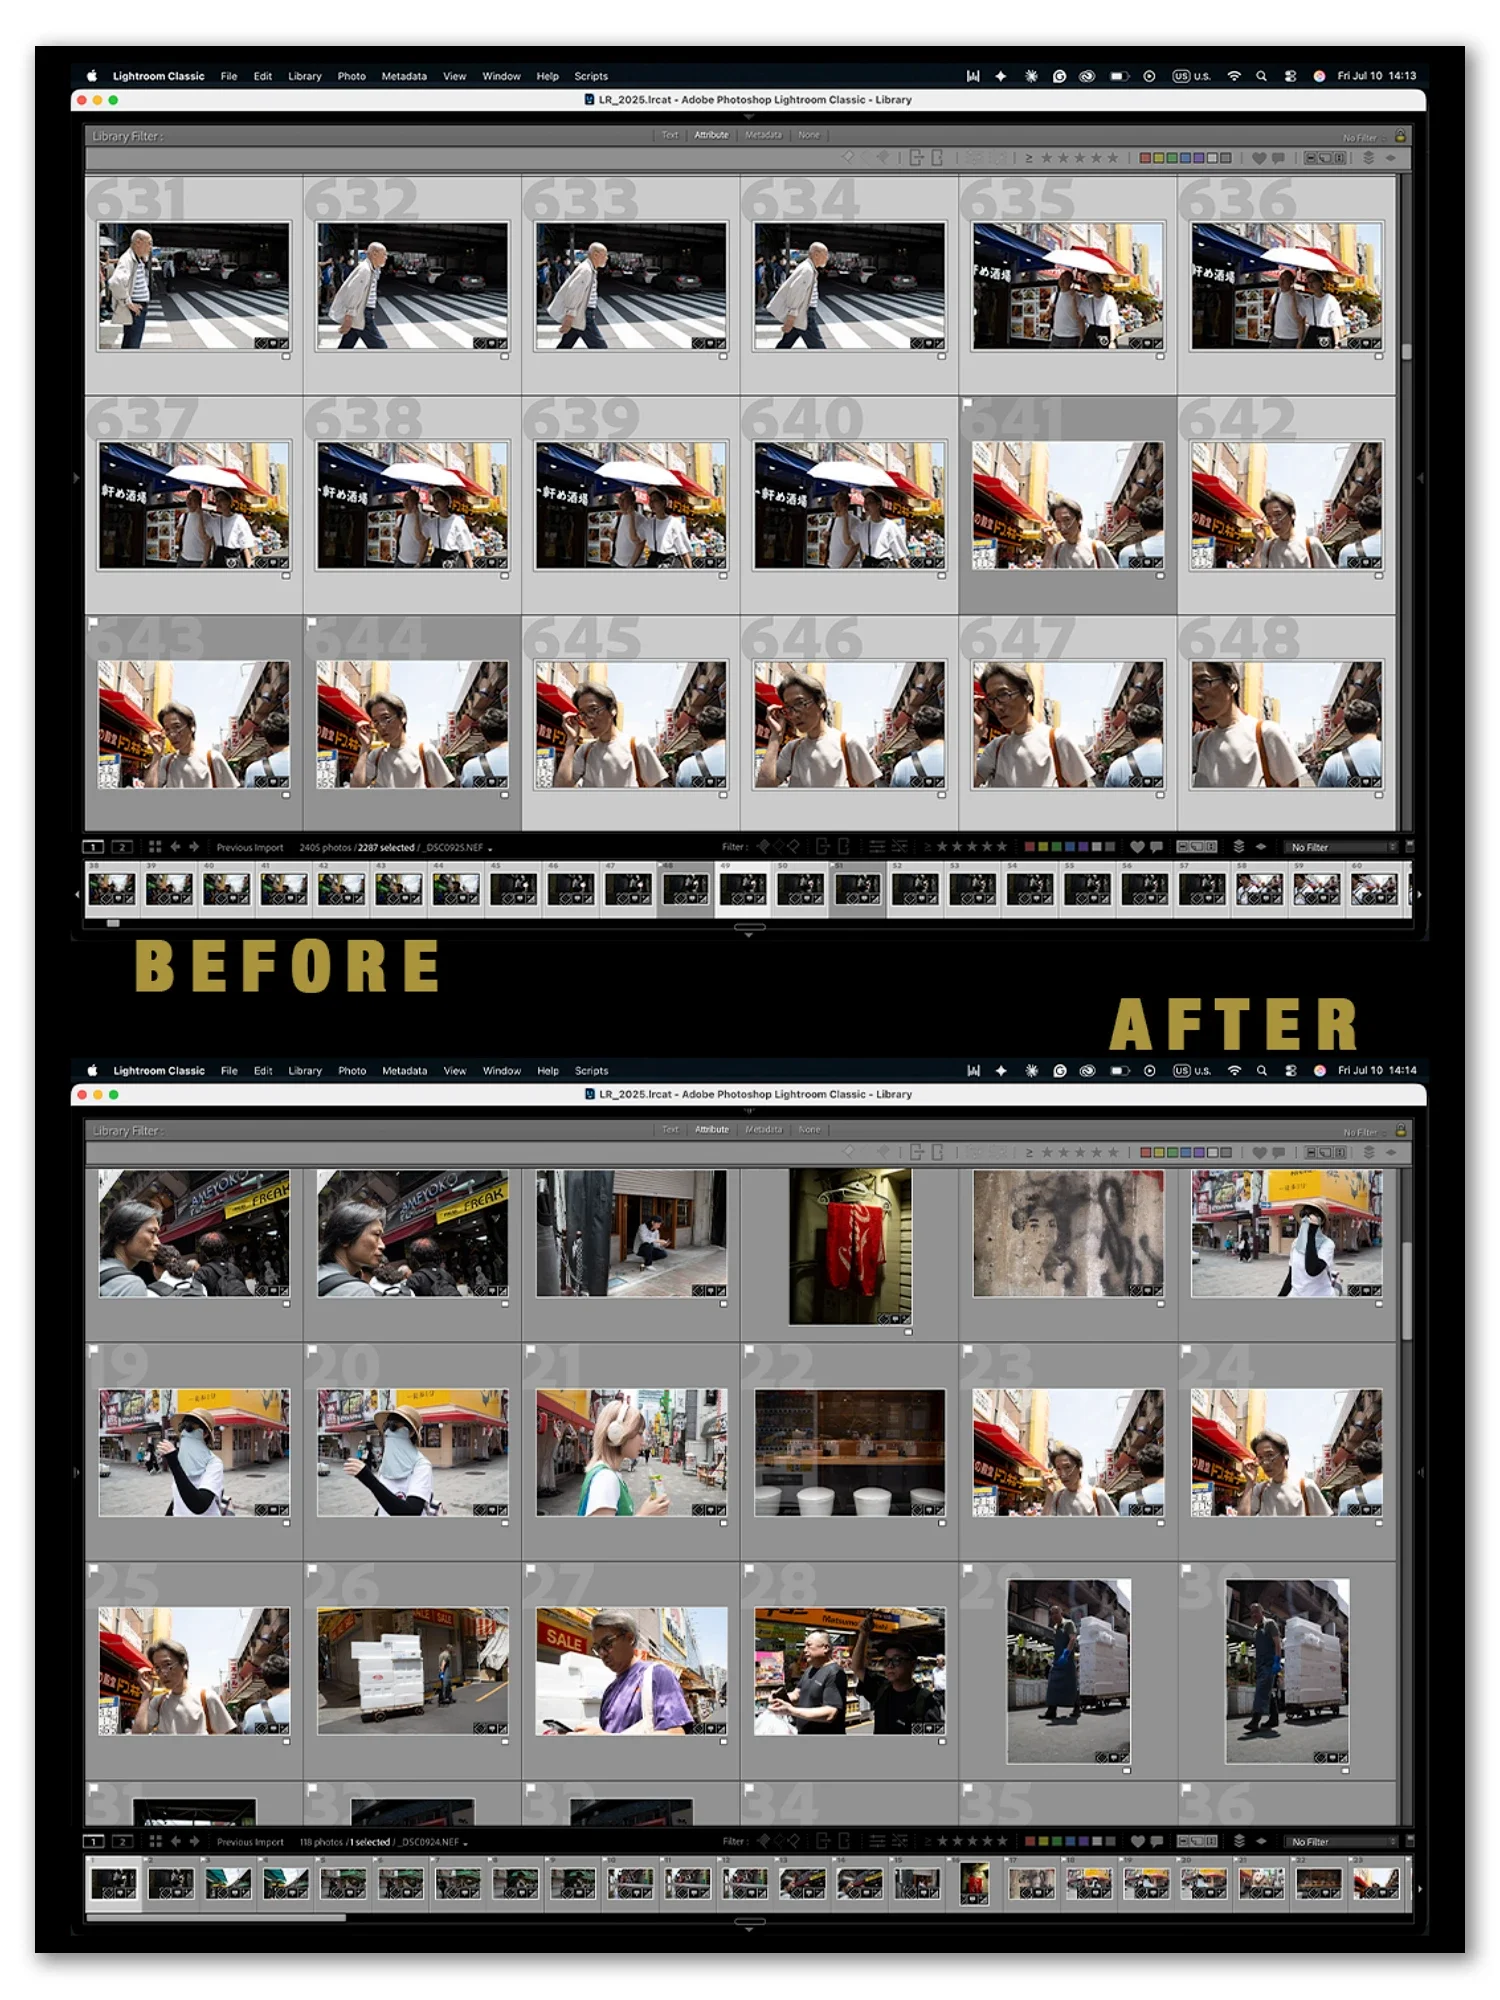
From 2000+ photos down to 118.
Should I shoot street photography in RAW or JPEG?
RAW is recommended for street photography because street light is high-contrast, and RAW preserves the latitude to recover highlights and shadows in editing. RAW+JPEG suits those who want quick previews, and JPEG-only is a valid choice for speed and a simpler workflow.
How should you edit street photography?
Edit for mood rather than clinical perfection: favour contrast and restraint over maximum clarity, keep a disciplined colour palette or commit to black and white, and treat grain and softness as tools. The goal is to make the viewer feel the moment.
Is culling part of street photography editing?
Yes — arguably the most important part. Strong editing is largely ruthless selection: keeping only the few frames that work and deleting the rest. Many photographers keep only a handful of images from hundreds or thousands of shots.
The streets never look the same way twice. I’m curious—how does this side of Tokyo hit you? Drop a comment below.
I live on flat whites and shutter clicks. If you’ve found value in these shots, toss a coffee my way to keep the sensor humming.
For those who want to skip the tourist traps and shoot the real Tokyo, my calendar is open for workshops. Explore the Masterclass here or email me at jeff@tokyoforgeries.com.
See you in the shadows.
Tokyo Forgeries is an evolving archive of Tokyo street photography and vintage-lens deep dives. We spend 30 days in every ward, using mid-century brass and glass to capture the city’s soul. This is a roadmap for the active pursuit of craft—documented through the geography of Tokyo and the character of its light.